Tuesday, February 28, 2023

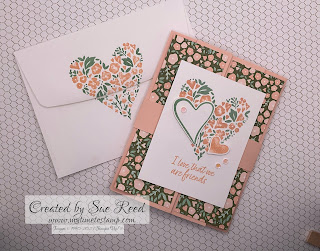
February 2023 Card Layout #25

 February 2023 Card Layout #25
SU’s Fancy Flora DSP

What fun patterned paper with SU’s Fancy Flora DSP. So many patterns and color combinations to choose from!! 

Measurements: 
  • Card base 5 1/2” x 8 1/2” cardstock
  • Second layer 4” x 5 1/4” coordinating cardstock
  • Third layer 3 7/8” x 5 1/8” cardstock
  • Cut three panels of DSP 1 5/16” x 3 1/8” DSP or embossed cardstock; 2 1/2” x 6” DSP for envelope
Directions:
  • Fold card base in half/
  • Adhere layers 2 and 3 to the card front.
  • Add ribbon or embossed cardstock strip.
  • Adhere the DSP panels with dimensionals.
  • Stamp sentiment.
  • Adhere DSP to envelop flap and trim.
SU’s products used to make this card can be found in my Online Store

Products:
  • Fancy Flora DSP 160413
  • Evening Evergreen Cardstock 155574
  • Daffodil Delight Cardstock 119683
  • Soft Succulent Cardstock 155776
  • Basic White Medium Envelopes 159236

Monday, February 27, 2023

February 2023 Card Layout #24

 February 2023 Card Layout #24
SU’s Desert Details Bundle, Dry Brushed Metallic Series Paper and Delicate Desert DSP

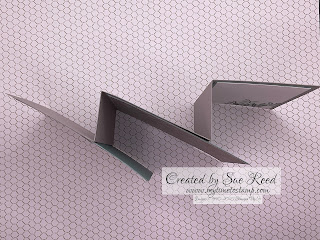
This is my take on Sue Campfield’s Flying Seagull Fun Fold. If you would like to see Sue’s video on how to put this card together, click on this link: https://youtube.com/live/rTIAXhpmGGk?feature=share 
The measurements are listed below. Use one of the back panels for your written message.


Here are their measurements:
  • Cut two pieces of white cardstock 8 1/4” x 4 1/4”. Score them both @ 2 1/4”, 4”, 6 1/4” to form the card base.
  • White cardstock 4 1/4” square for pop up panel and a scrap for sentiment
  • Two panels 1 1/2” x 4” of DSP
  • Two panels 2” x 4” of DSP
  • 4” square of DSP
If you would like to see how to put this card together, see Sue Campfields’ YouTube video. See link above.

The SU products used to make this card can be found in my Online Store
  • Desert Details Bundle 160532
  • Dry Brushed Metallic Specialty Designer Series Paper 160837
  • Delicate Desert DSP 160521
  • Stylish Shapes Dies 159183
  • Cajun Craze Cardstock 119684
  • Basic White Cardstock 159276
  • Cajun Craze Classic Stampin’ Pad 147085
  • Gold Faceted Adhesive-Backed Sequins 160536

Sunday, February 26, 2023

February 2023 Card Layout #23

 February 2023 Card Layout #23
SU’s Dainty Flowers DSP Fun Fold

What a fun way to use SU’s beautiful Dainty Flowers DSP!! This DSP is free with a $50 purchase until February 28th.


Measurements:
  • Card base 4 1/4” x 5 1/2” cardstock
  • Cardstock 3 1/2” x 7”
  • DSP 5 1/4” x 11”; 3 1/4” square; 2 1/2” x 6” for the envelope
  • White cardstock 3 1/4” square and scrap for label and sentiment
Directions:
  • Score the DSP ;panel @ 1 3/4”, 3 1/2”, 5 1/4” and 7”. Fold accordion style on score lines.Attach it to the card base.
  • Fold 7” cardstock panel in half. Adhere the DSP panel and the white cardtock panel to this panel.
  • Adhere this to the front panel and the second to the last panel of DSP.
  • Add a label to the front panel.
  • Add embelishments.
  • Adhere DSP panel to the envelope flap and trim.
The products need to make this card can be found in my Online Store

Products:
  • Old Olive cardstock 100702
  • Dainty Flowers DSP - to available but you can substitute another DSP!
  • Basic White cardstock 159276
  • Petal Park Bundle 160571
  • Crushed Curry 147087 and Starry Sky 159212 Classic Stampin’ Pads
  • Enamel Dot Essentials 160751
  • Basic White Medium Envelopes 159236

Friday, February 24, 2023

February 2023 Card Layout #22

 February 2023 Card Layout #22
SU’s Two-Tone Flora Bundle and Delicate Desert DSP Fun Fold Card

This is a fun fold card using two of SU’s products from the January-April 2023 Mini Catalog.


Measurements:
  • Card base 4 1/4” x 11” cardstock; two each 4” squares; and 2 1/2” x 4”.
  • DSP Two each 3 7/8” squares
  • White cardstock 2 3/8” x 3 7/8” and scrap for stamping flowers and leaves.
Directions:
  • Score card base at 2 1/2”, 3 3/4”, 6 3/4” and 8 1/4”. Fold accordion style on score lines.
  • Stamp DSP square with leaves and sentiment. Attach to one cardstock square. Attach the other DSP square to the remaining cardstock square.
  • Stamp flowers and leaves and die cut them. Attach to stamped DSP square with dimentionals. Attach to front card base panel. Attach the other DSP square to the middle card base panel.
  • Stamp white cardstock rectangle and attach to the remaining cardstock rectangle. Attach to the last card base panel.
  • Stamp envelope.
The SU products needed to make this card can be found in my Online Store
  • Two-Tone Flora Bundle 160844
  • Gray Granite Cardstock 146983
  • Soft Succulent Cardstock 155776
  • Basic White Cardstock 159276
  • Delicate Desert DSP 160521
  • Soft Succulent 155778 and Evening Evergreen 155576 Classic Stampin’ Pads

Thursday, February 23, 2023

February 2023 Card Layout #21

 February 2023 Card Layout #21
Trifold Accordion Fun Fold Card
SU’s Favored Flowers DSP
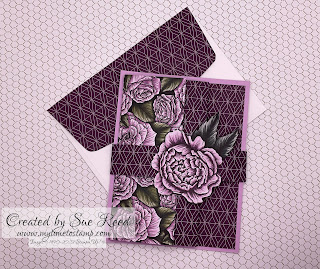
Another fun fold with SU’s Favored Flowers DSP. This paper is so gorgeous! I can see this card made in all the designs included in this paper. The paper is available for free with a $50 purchase until Feb. 28th.


Measurements:
  • Double sided pattern paper 5 1/4” x 11 1/2”; 1” x 9” strip for belly band; 2 1/2” x 6” for envelope
  • 4 1/4” x 5 1/2” colored cardstock for the base
  • White cardstock 2 3/8” x 4 7/8” for the inside
Directions:
  • Score the double sided pattern paper at 4”, 6 3/4”, and 9 1/2”, folding on the score lines
  • Adhere to the color cardstock base.
  • Wrap the pattern paper strip for the belly band around the card and adhere together on the front side.
  • Cover the belly band in front with a die cut or image.
  • Adhere the pattern paper strip to the flap of the envelope and trim.
  • Add embellishments.
Products used to make this card can be found in my Online Store

SU Products:
February 2023 Card Layout #20

 February 2023 Card Layout #20
Fun Fold with SU’s Favored Flowers DSP
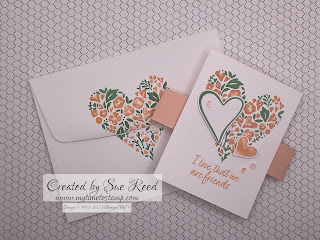
Another great fun fold using a half sheet of double sided patterned. SU’s Favored Flowers DSP is so beautiful. With this fun fold, you can make two beautiful cards!!


Measurements:
  • Two sided patterned paper 5 1/4” x 12; 2 1/2” x 6” for envelope
  • White Cardstock 3 3/4” x 5” for the inside; 3” x 4” for front of card
  • Colored cardstock 4 1/4” x 5 1/2”; 3” x 4 1/4”
Directions:
  • Score the patterned paper at 4” on both sides of the long side of the paper and fold in the score lines.
  • Adhere to the larger piece of colored cardstock.
  • Adhere the larger white cardstock panel to the inside of the card.
  • Die cut the smaller piece of white cardstock and smaller piece of colored cardstock with some nestling die shapes.
  • Stamp sentiment on white piece. Stamp images or adhere die cut images to white label piece.
  • Add embellishments.
  • Adhere smaller panel of patterned paper to envelope flap and trim.
The products used on this card can be found in my Online Store

SU Products used on this card:
  • Favored Flowers DSP 160833 Available free with Sale A Bration until Feb. 28th
  • Fresh Freesia Cardstock 155613
  • Basic Cardstock 159276
  • Country Bouquet Stamp Set (for sentiment) 160377
  • Deckled Rectangles (for label) 159173
  • Adhesive-Backed Milky Dots 160582

Sunday, February 19, 2023

February 2023 Card Layout #19

 February 2023 Card Layout #19
SU’s Dainty Flowers DSP

SU’s Dainty Flowers DSP is SO beautiful. I loved using it on this fun fold pocket card.


Measurements:
  • Cardstock base 4 1/4” x 5 1/2”
  • Cardstock 3 1/2” x 3 1/2”
  • DSP 4” x 5 1/4”; 3 1/4” x 3 1/4” square; 3” x 8”; 2 1/2 x 6” for envelope
  • White cardstock 2 3/4” x 3 3/4” for inside; 3 1/2” x 3 1/2” square
Directions:
  • Adhere DSP panel to card base.
  • Cut the square white cardstock and square DSP in half diagonally. Adhere one half of DSP to one half of the white cardstock. Adhere to card front using tear and tape. (Save the two remaining pieces for another card.)
  • Fold the 3” x 8” piece of DSP in half. Adhere the remaining white cardstock to the inside.
  • Add a sentiment.
  • Place card into the pocket on the front of the card base.
  • Adhere DSP on the envelope flap and trim.
The products used to make this card can be found in my Online Store
  • Dainty Flowers DSP (available with a $50 purchase until February 28th, 2023)


February 2023 Card Layout #18

 February 2023 Card Layout #18
SU’s Two-Tone Flora Bundle, Something Fancy Bundle and Fancy Flora DSP

Fancy Flora DSP is so beautiful. You can make many different versions of the card layout with this DSP.


Measurements:
  • 5 1/2” x 8 1/2” for the base and scraps of cardstock to cut with two nesting dies
  • 4” x 5 1/4”; 3/4” x 4” DSP
  • White cardstock scraps to stamp and die cut flowers and leaves
Directions:
  • Score the base at 4 1/4” and fold on the score line.
  • Adhere DSP panel to card front.
  • Cut two nesting dies out of cardstock.
  • Stamp smallest nesting die cut with sentiment and adhere to the larger nesting die cut.
  • Stamp flowers and leaves and die cut them out. Add them to the sentiment die cut.
  • Stamp envelope.
  • Adhere the strip of DSP to card front.
  • Add the sentiment panel to the card front.
  • Add embellishments.
The products needed to make this card can be found in my Online Store
  • Daffodil Delight Cardstock 119683
  • Soft Succulent Cardstock 155776
  • Basic White Cardstock 159276
  • Two-Tone Flora Bundle 160414
  • Something Fancy Bundle 160425
  • Fancy Flora DSP 160413
  • Deckled Rectangles Dies 159173
  • Daffodil Delight Classic Stampin’ Pad 147094
  • Soft Succulent Classic Stampin’ Pad 155778
  • 2021-2023 In Color Opal Rounds 159185


Saturday, February 18, 2023

February 2023 Card Layout #17

 February 2023 Card Layout #17

A fun fold that uses SU’s designer series paper (DSP). This fun fold is perfect for a wedding card. I did not purchase the Framed Florets stamp set or dies. But I had to have this paper! A little fussy cutting to get the images to add to the card. The paper is no longer available, but any double sided paper would work.


To make the fun fold flap, measure down 2 3/4” from the top of the outside edge of the card. Cut from the second scoreline to the mark on the outside edge. Repeat of the other side.


Measurements:
  • 5 1/2” x 12” and 2 1/2” x 6” patterned paper
  • 3 3/4” x 5 1/4” white cardstock and scrap for label
  • Cardstock for label or punch 
Directions:
  • Score patterned paper at 2”, 4”, 8” and 10”. Fold on score lines for the card base. Measure 2 3/4” from the top on each side of the card and make a pencil mark. Cut from the top of the second scoreline to the pencil mark on each side. See picture below.


  • Stamp sentiment on white card stock. Stamp or decorate as you wish. Adhere to inside of card.
  • Stamp white cardstock scrap and die cut or punch label. Add label to front left side panel.
  • Adhere smaller panel of patterned paper to envelope flap and trim.

February 2023 Card Layout #16

 February 2023 Card Layout #16
SU’s A Fish and A Wish Stamp Set

I used the faux tile technique on this card. Here is where SU’s Simply Scored Scoring Tool comes in handy. This technique also works best with either blue or green tones of ink.


Measurements:
  • Card base 4 1/4” x 5 1/2” cardstock
  • Layer 4” x 5 1/4” white cardstock
  • White cardstock 2 3/4” x 3 3/4”
  • Cardstock 2 7/8” x 3 7/8”
Directions:
  • Score card base at 4 1/4” and fold on scoreline to make the card base
  • Attach white cardstock layer to card front.
  • Score smaller white cardstock at every 3/4” (3/4”, 1 1/2”, 2 1/4” and 3”) on long side. Turn cardstock 90 degrees and score at every 3/4” (3/4”, 1 1/2” and 2 1/4”).
  • Stamp the smaller cardstock-the score lines will show through to make the tile affect.
  • Attach to cardstock piece. Adhere to card front with dimensionals.
  • Stamp sentiment on card front.
  • Stamp envelope.
The products needed to make this card can be found in my online store
  • A Fish & A Wish 158993
  • Orchid Oasis Cardstock 159267
  • Basic White Cardstock 159276
  • Simply Scored Scoring Tool 122334
  • Starry Sky Cardstock 159263
  • Starry Sky Classic Stampin’ Pad 159212

Friday, February 17, 2023

February 2023 Card Layout #15

 February 2023 Card Layout #15
SU’s Flowers & More Host DSP and At the Pond Host Stamp Set

A Tri-fold Angled Flap fun fold card featuring the cute At the Pond stamp set and the beautiful Flowers and More DSP. Love the colors in this DSP and the cute froggy!!


Measurements:
  • Cardstock for base 5 1/2” x 11”
  • DSP 4” x 5 1/4” and 2 1/4” x 5 1/4”
  • White cardstock 4” x 5” for label, image and sentiment
Directions:
  • Score base cardstock at 4 1/4” and 8 1/2”. Cut in 1” from the fold on the top flap to the bottom left corner of the flap.
  • Adhere the larger DSP to the card base flap underneath the top flap.
  • Cut in 3/4” from the top right edge of the smaller DSP down to the lower left hand corner. Adhere to the top flap of the card base.
  • Die cut a label/tag. Stamp image on white cardstock, die cut or fussy cut. Stamp background on label/tag. Adhere stamped image to label/tag. Adhere label/tag to card front with dimensionals so that the flap is held down by the label/tag.
  • Add ribbon/embellishments.
The products need to make this card can be fount in my online store
  • On the Pond Host Stamp Set (with an order of $150 or more) 160801
  • Flowers & More DSP (with an order of $150 or more) 160802
  • Tahitian Tide Cardstock 159261
  • Basic White Cardstock 159276

Wednesday, February 15, 2023

February 2023 Card Layout #14

 February 2023 Card Layout #14
SU’s Fragrant Flowers Stamp Set and Favored Flowers DSP


SU’s Favored Flowers DSP is available free through SALEa-bration until February 28, 2023, with a qualifying purchase of $50. It coordinates with SU’s Fragrant Flowers Bundle.

Measurements: 
  • Card base 5 1/2” x 8 1/2” cardstock
  • Layer 2 3/4” x 51/2”
  • Layer 1 1/2” x 4 1/4”
  • Die, punch or label
Directions:
  • Score card base cardstock at 4 1/4” and fold on the score line.
  • Attach first layer to the card front. This can be embossed cardstock, DSP or a stamped panel.
  • Attach second layer to card front.
  • Add label and sentiment.
The products you need to make this card can be found in my online store

Products:

Monday, February 13, 2023

February 2023 Card Layout #13

 February 2023 Card Layout #13
SU’s Desert Details Bundle and Delicate Desert DSP

This is a layout that I received through a card challenge. The colors in the DSP are so beautiful. I love the desert feel!!

Measurements:
  • Card base 5 1/2” x 8 1/2”, scored at 4 1/4” and folded on the score line.
  • Cardstock 4” x 5 1/4”, embossed, scraps
  • DSP 1 3/4” x 5 1/4”
  • Vellum 3” x 3 3/4” 
  • White cardstock scraps
Directions:
  • Emboss cardstock panel. Adhere to card front.
  • Adhere DSP panel to card to the embossed panel.
  • Adhere the vellum to DSP panel placing glue where it will be covered with die cut flowers.
  • Stamp flowers on white cardstock and die cut them out. Stamp sentiment on biggest flower. Attach the flowers to the vellum layer with dimensionals.
  • Die cut the plants on cardstock scraps. Attach them behind the flowers.
  • Add embellishments.
  • Stamp envelope.
Products used to make this card can be found in my online store
  • Desert Details Bundle 160532
  • Delicate Desert DSP 160521
  • Pale Papaya Cardstock 155668
  • Cajun Craze Cardstock 119684
  • Painted Texture 3D Embossing Folder 154317
  • Soft Succulent Cardstock 155776
  • Vellum Cardstock 101856
  • Basic White Cardstock 159276
  • Basic Gray Classic Stampin’ Pad 149165 
  • Iridescent Pastel Gems 160429

Sunday, February 12, 2023

February 2023 Card Layout #12

 February 2023 Card Layout #12
SU’s Two-Tone Flora Bundle, Something Fancy Bundle and Fancy Flora DSP

This DSP is gorgeous. It was so hard to pick a pattern to use on this card. So that is what I did. I made two cards to start with. I am sure I will be making more using that DSP.


Measurements:
  • Cardstock 4 1/4” x 11”; 3” x 4”
  • DSP 2” x 4”; 3” x 4” and scrap
  • White cardstock 2 3/4” x 3 3/4” and scrap
Directions:
  • Score cardstock at 2 1/4” and fold. Then fold the bottom of the cardstock up to meet the edge.
  • Adhere DSP panels to the card front.
  • Die cut the tag from the DSP scrap and stamp sentiment,
  • Stamp flower and leaf on white cardstock scrap; die cut them out. Also stamp envelope.
  • Adhere the cardstock and white panels together. 
  • Add die cuts with dimensionals to the white panel and adhere to the panel to the card front.
The products need to make this card can be found in my online store
  • Evening Evergreen Cardstock 


Saturday, February 11, 2023

February 2023 Card Layout #11

February 2023 Card Layout #11
 SU’s Desert Details Bundle and Delicate Desert DSP


Another layout using scraps from this gorgeous DSP. I realized after I finished the card, I should have also used SU’s Dry Brushed Metallic Specialty DSP (160837 ). That would have added a little shine to this card!!

Measurements:
  • Cardstock 5 1/2” by 8 1/2” and 2 3/8” square
  • Cardstock 4” x 5 1/4”
  • DSP 8 each 1 1/4” squares; 2 1/2” x 6” panel
  • Neutral cardstock 2 1/2” square
Directions:
  • Score cardstock at 4 1/4” and fold to make the card base.
  • Adhere 4” x 5 1/4” cardstock to card front.
  • Add die cut or sentiment to neutral cardstock square.
  • Adhere neutral cardstock square to 2 3/8” cardstock square.
  • Position the squares and the cardstock square to card front and adhere.
  • Add any embellisments.
  • Adhere DSP panel to envelope flap and trim.
The products to make this card can be found in my online store
  • Cajun Craze Cardstock 119684 
  • Soft Succulent Cardstock 155776 and Classic Stampin’ Ink Pad 155778
  • Delicate Desert DSP 160521 
  • Basic White Cardstock 159276
  • 2021-2023 In Color Opal Rounds 159185

February 2023 Card Layout #10

 February 2023 Card Layout # 10
SU’s Country Bouquet Bundle and Country Floral Lane DSP

I love SU’s Banners Pick A Punch. I love how the banners are used on this card.


Measurements:
  • Cardstock 5 1/2” x 8 1/2” , 2 1/2” x 3 3/4” and 1” x 4” strip
  • DSP 4” x 5 14”; 2 1/2” x 6”
  • DSP 1/2” x 4” strip
  • White 2 1/4” x 3 1/2” 
Directions:
  • Score cardstock at 4 1/4” and fold on the score line for the card base
  • Attach DSP panel to the card front
  • Use the banner punch on each end of the cardstock and DSP strips
  • Stamp the white cardstock panel with sentiment in Sweet Sorbet Ink and attach to the cardstock panel. Attach the cardstock banner to the back. Attach the DSP banner to the top with dimensionals
  • Punch the heart and leaves from the DSP; fussy cut the bicycle from the DSP and add to white panel with dimensionals. Add the heart and leaves.
  • Adhere the DSP to envelope flap and trim.
The following products used on this card can be found in my online store
  • Country Bouquet Bundle 160838
  • Country Floral Lane DSP 160375
  • Country Gingham DSP 160388
  • Sweet Sorbet Cardstock 159268and Classic Stampin’ Ink Pad 159216
  • Basic White Cardstock 159276
  • Banners Pick A Punch 153608


Thursday, February 9, 2023

February 2023 Card Layout # 9

 February 2023 Card Layout #9
SU’s Country Bouquet Bundle and Country Floral Lane DSP

Today’s layout is a very simple layout. A great way to use up your scraps!! You can keep it simple or step it up with layers and embossing.


Measurements:
  • Sweet Sorbet Cardstock (159268) 5 1/2” x 8 1/2”
  • Country Floral Lane DSP (160375) Six 1 1/4” squares; 2 1/2” x 6”
  • Petal Pink Cardstock (146985) 4” x 5 1/4”  - optional
  • Basic White Cardstock (159276) 3 7/8” x 5 1/8”  and scrap
Directions:
  • Score Sweet Sorbet Cardstock @4 1/4” and fold on the score line to make the base.
  • Adhere the Petal Pink Cardstock to card front- optional
  • It is optional to emboss the Basic White Cardstock. I used the Cane Wave 3D folder (160580).
  • Adhere the Basic White Cardstock to the card front.
  • Die cut a circle and label with the Basic White cardstock scrap with the Stylish Shapes Dies (159183). Stamp the sentiment on the label die cut.
  • Use the punch from the Country Bouquet Bundle (160377) to punch out the heart and leaves design from the Country Floral Lane DSP. Adhere to the circle die cut. Adhere label. Add circle to card front with dimensionals. 
  • Adhere the DSP strip to the envelope and trim.
The products used to make this card can be found in my online store

February 2023 Card Layout #8

 February 2023 Card Layout #8
SU’s Fancy Floral DSP

Just love SU’s Fancy Floral DSP. This card layout shows off the beautiful DSP!!


Measurements:
  • Evening Evergreen Cardstock (155574) 5 1/2” x 8 1/2”, scored at 4 1/4” and folded on the score line; 2 3/4” x 4”
  • Soft Suede Cardstock (115318) 4” x 5 1/4”, embossed
  • Fancy Floral DSP (160413) cut two 1 1/4” squares; cut two 1 1/4” x 2 1/2”; 2 1/2” x 6” and scrap for label
Directions:
  • Emboss Soft Suede with the Cane 3D Embossing Folder (160580) and attach to the card front.
  • Adhere the DSP pieces to the Evening Evergreen rectangle leaving a border around each piece.
  • Attach the Evening Evergreen rectangle to the card front with dimensionals.
  • Cut a tag with Something Fancy Die (160424). Stamp sentiment on die cut. Add ribbon and linen thread. Attach to card front with dimensionals.
  • Add 2021-2023 In Color Opal Rounds (159185) 
  • Adhere DSP panel to envelop flap and trim
The products you need to make this card can be found in my online store

Tuesday, February 7, 2023

February 2023 Card Layout #7

 February 2023 Card Layout #7
SU’s Country Bouquet Bundle and Country Floral Lane DSP

Another challenge layout that I received from another FB stamp group. Keeping that red theme so far this month.


Measurements:
  • Sweet Sorbet Cardstock (159268) 5 1/2” x 8 1/2”, scored at 4 1/4” and folded on score line.
  • Mint Macaron Cardstock (138337)4” x 5 1/4” and one circle
  • Country Floral Lane DSP cut 2 different patterns: 3 7/8” x 2 1/2” 
  • Country Gingham DSP 7/8” x 4”
  • Basic White Cardstock (159276) for one circle and scraps for hearts and leaves
Products:
  • Country Bouquet Bundle (160383)
  • Country Floral Lane DSP (160375)
  • Country Gingham (160388)
  • Whisper White Crinkled Seam Binding Ribbon (151326)
  • Sweet Sorbet and Mossy Meadow Inks
All the products needed to make this card can be found in my online store

Monday, February 6, 2023

Back to Back Bendy Card

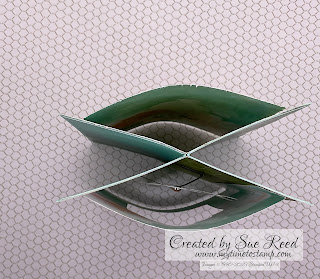
 Here is my take on a “back to back bendy card” that I saw by Rachel Tessman on YouTube. It is so much fun to make. Check it out on Rachel’s YouTube channel.

This card is a result of a challenge that was given the members of our stamp club. We were given some retired SU DSP to create a project. I love to do fun folds so here it is. Again, thank you to Rachel Tessman!


February 2023 Card Layout #6

 February 2023 Card Layout # 6
A Fun Fold with SU’s Country Bouquet Bundle and Country Floral Lane DSP

This is such a gate fun fold with a little bit of a twist. If you take a closer look at the last two pictures you will see that how DSP panels are attached to the front of the card. The panels actually hang off the side. So the DSP panels are actually wider than the cardstock panel.


 Measurements:
    • 5 1/2” x 11” Petal Pink cardstock, scored at 1 1/4” and 4 7/8” on both ends. Fold on the score lines.
    • 1” x 9 1/2” Petal Pink cardstock for the belly band.
    • 4 panels @ 1 7/8” x 5 1/4” Country Floral Lane DSP
    • 2 pieces Basic White @ 3” x 4” for the front and inside
Other Products Used:
  • Mint Macaron (147106) and Petal Pink (147109) Inks
  • Pastel Adhesive Backed Sequins (160387)

Sunday, February 5, 2023

February 2023 Card Layout #5

 February 2023 Card Layout #5
SU’s Country Bouquet Bundle, Country Floral Lane & Country Gingham DSP


Measurements:
  • Sweet Sorbet (159269) cardstock 5 1/2” x 8 1/2”, scored at 4 1/4” and folded on score line
  • First layer 4” x 5 1/4” and 1/2” x 4 1/4” Country Floral Lane DSP (160375)
  • 2 7/8” x 3 3/8” Country Gingham DSP (160388)
  • Scraps of Basic White (159276) cardstock for sentiment and heart/circle focal point
Other Products Used:
  • Die for circle
  • Sweet Sorbet Ink (159216)
  • Pastel Adhesive Backed Sequins (160387)
The products you need to make this card is found in my online store

Saturday, February 4, 2023

February 2023 Card Layout #4

February 2023 Card Layout #4 
SU’s Country Bouquet and Country Floral Lane DSP

Measurements:
  • Balmy Blue Cardstock 5 1/2” x 8 1/2”, scored at 4 1/4” and folded on the score line
  • First layer is a 4 1/4” x 5 1/2” Balmy Blue Cardstock-can be embossed. I used Timeworn Type 3D embossing folder.
  • Basic White Cardstock 2” x 3 1/2” and 1/2 strip for sentiment
  • Country Floral Lane DSP 2” x 2”
Other Products Used:
  • Country Bouquet Bunde (#160383)
  • Pastel Adhesive-Backed Sequins (160387)
  • Mossy Meadow cardstock scrap for leaves 
  • Balmy Blue and Mint Macaron Ink
You can find the products needed to make this card in my online store

Friday, February 3, 2023

February 2023 Card Layout #3

 February 2023 Card Layout #3
SU’s 2022-2024 In Colors

Fun card layout using SU’s In Colors: Sweet Sorbet, Parakeet Party, Tahitian Tide, Starry Sky, and Orchid Oasis. So bright!! Also used SU’s 2022-2024 In Color 6”x6” Designer Series Paper (DSP).


You can find the following products to design this card in my online store
    • Simply Fabulous Stamp Set - three flowers, fussy cut
    • Orchid Oasis cardstock 5-1/2” x 8-1/2” and 4” x 4” embossed
    • 2022-2024 In Color 6”x6” DSP Cut three 1” x 2”
    • Painted Texture 3D Embossing Folder
    • Basic White Cardstock 1-1/2” x 2-3/4” and scrap for flowers
    • Stampin’ Up Classic Stampin’ Pad in 2022-2024 In Colors-stamp envelope flap
    • 2022-2024 In Color Matte Decorative Dots
Here’s an alternative to this layout using SU’s Desert Design Bundle. I changed the orientation to landscape.


I used the following products on the layout. I used a die from the Desert Design dies to cut the DSP rather than cut the 1” x 2” rectangles. I used the following products from my online store
    • Desert Design Dies
    • Delicate Desert Designer Paper and Dry Brushed Specialty Paper- die cut 4 shapes and bush
    • Crumb Cake cardstock 5-1/2” x 8-1/2” folded in half;  4” x 4” embossed
    • Ginkgo Branch Stamp Set - stamp one die cut with sentiment in Cajun Craze ink
    • Delicate Desert Designer Paper 2-1/2” x 6” Adhere to envelope flap and trim.

Thursday, February 2, 2023

February 2023 Card Layout #2

 February 2023 Card Layout #2
SU’s Country Bouquet Bundle and SU’s Country Floral Lane DSP


I don’t usually purchase SU’s Valentine like stamp sets, but I couldn’t pass this one up. Every card layout I see now, I envision using this set. The products I used are:

    Country Bouquet Stamp Set
    Country Bouquet Punch
    Country Floral Lane DSP
    Stacked Stone Stamp
    Stylish Shapes Dies

I added Adhesive Backed Milky Dots. The layers are as follows:

    Basic Gray Cardstock 5-1/2” x 8-1/2”. Score and fold at 4-1/4” and two pieces: 2” x 4” and 1-1/4” x 4”
    On the two pieces I used the Stack Stone Stamp with Basic Gray Classic Stampin’ Pad. I used Stampin’     
    Dimensionals to adhere to the card front.
    Country Floral Lane Designer Series Paper (DSP) 1-1/4” x 4” 
    Basic White scraps for sentiment and for stamping the hearts with Sweet Sorbet and Gray Granite
    Classic Stampin’ Pads.  I used the Country Bouquet Punch for the stamped hearts. I used a label from
    the Stylish Shapes dies.
    I stamped the Basic White 4” x 5-1/4” layer and envelope with hearts from the stamp set.

Check out my online store for all these products and a reminder that you can earn a free Sale-A-Bration product for each $50 you order. Check out the Sale-A-Bration catalog. You can find a link to the catalog in my online store.
    

Wednesday, February 1, 2023

February 2023 Card Layout #1

 February 2023 Card Layout #1
SU’s County Bouquet Bundle and SU’s Country Floral Lane DSP

Another card fun fold challenge. Love this bundle and the coordination DSP.


Here are the measurements:
    1. Card base is a piece of cardstock 5 1/2” x 11”, scored @ 1 3/4”, 3 1/2”, 5 1/4”, and 7”. I used Soft Succulent (155776).
    2. Four pieces of DSP cut at 1 1/4” x 5 1/4”. I used Country Floral Lane (160375).
    3. 3” x 6” cardstock scored at 3”. I used Sweet Sorbet (159268).
    4. A 2 3/4” of square cardstock and a 2 5/8” square of neutral cardstock. I used Sweet Sorbet (159268) and Basic White (159276)
    5. Scraps of Basic White for the sentiment and for stamping the images.
    6. Added Pastel Adhesive Backed Sequins (160387)

Used SU’s Country Bouquet Bundle (160383).

You can find the products for making this card in my online store. A reminder that you can earn a free product with every $50 spent during Sale-A-Bration. You can find the Sale-A-Bration catalog in my online store.


May 2023 Card Layout #2

 May 2023 Card Layout #2 SU’s Irresistible Blooms Bundle and Hello, Irresistible DSP Great layout so show off this DSP. I was lucky to have ...